Monday, September 23, 2013

Historical Sew Fortnightly Challenge #19: Wood, Metal, Bone

Challenge #19 is ‘Wood, Metal, Bone’: Cloth may be the most obvious material in historic costuming, but wood, metal, and bone are just as important to creating the right look and silhouette.  They are often, literally, the foundations of a period garment, with shoes made from wood; skirt supports made from wood, metal or bone; and bodies and bodices shaped with the same.  Wood, metal and bone provided the finishing touches too garments too, in metal jewellery, wood and bone fan sticks, and straw hats. For this challenge, make anything that incorporates wood, metal, or bone.

Fabric:
1/2 yard off white muslin and 1/3 yard stiff batik like material
Pattern: 
Self drafted, 1 trapezoid front piece, two kinda trapezoid back pieces (backlacing) and a gusset on each hip. One layer lining, one stiff lining and one outer.
Year: 
1839 for front inspiration and 1810-20s for back.
Notions:
6 12" white steel bones and 18 metal eyelets
How historically accurate is it?
Fairly! Aside from forgetting to add shoulder straps but that shall be soon. And I think metal eyelets aren't quite period but I'll be flossing over them  eventually to reinforce them anyways.
Hours to complete:
1 day
First worn:
Today! Trial run to see how comfortable it is. It actually hides under a tshirt pretty well.
Total cost:
$3 for the muslin, everything else was in my stash.
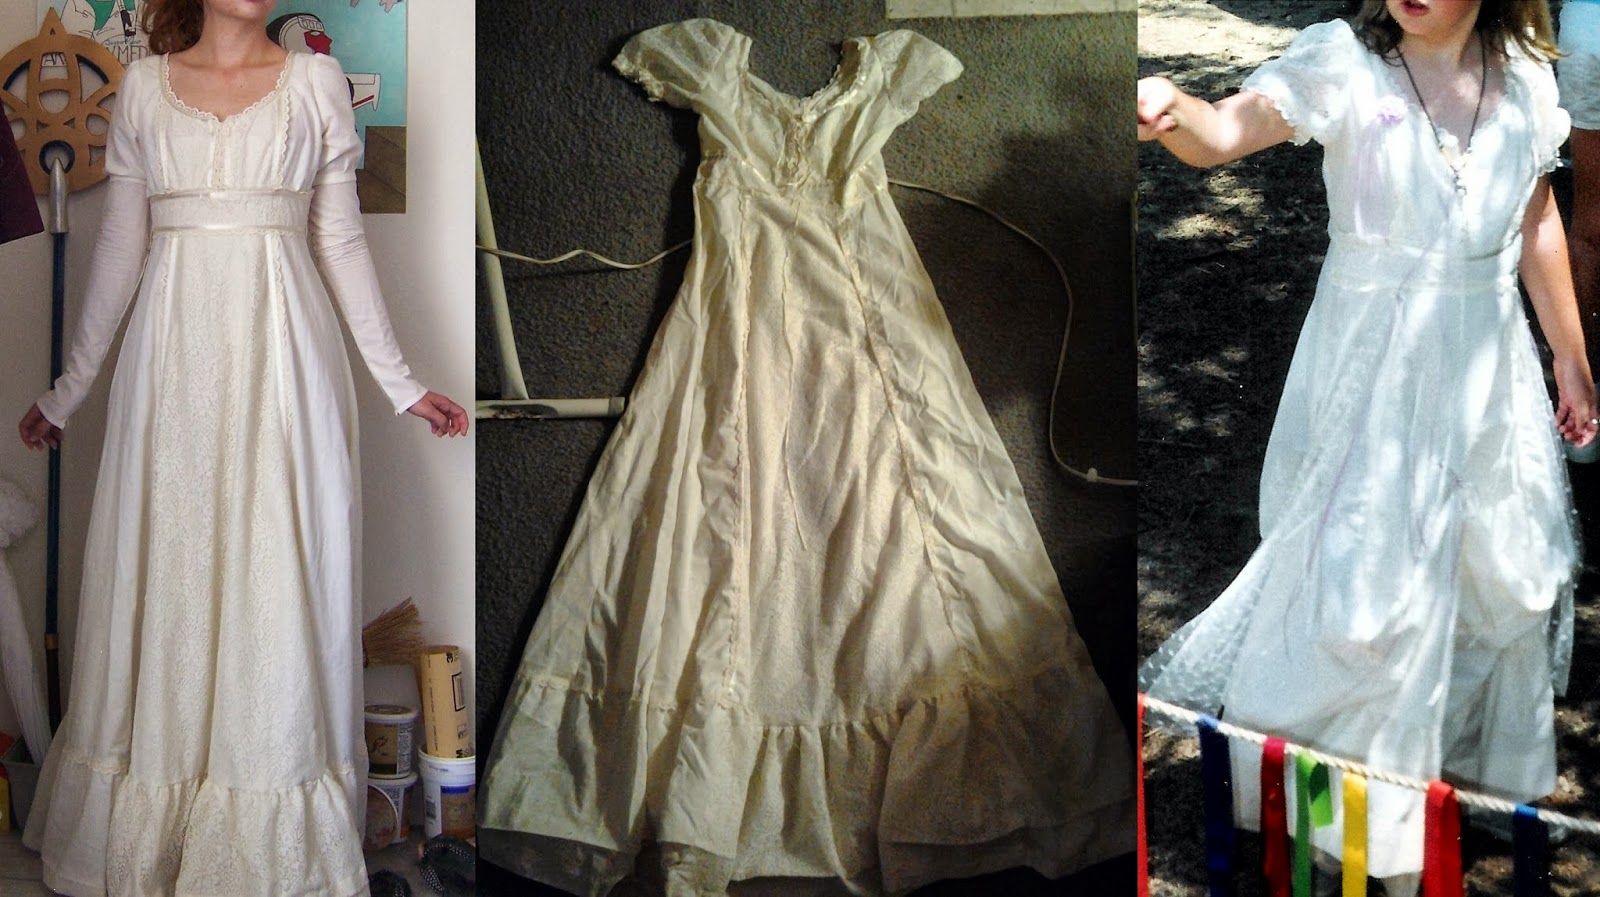
I'm making Summer Stays!
I didn't really take any progress pics while working on this since I wanted to see if I could get it done in a day. :x I drafted the pattern after gazing through a pinterest board of extant Regency stays the night before. 
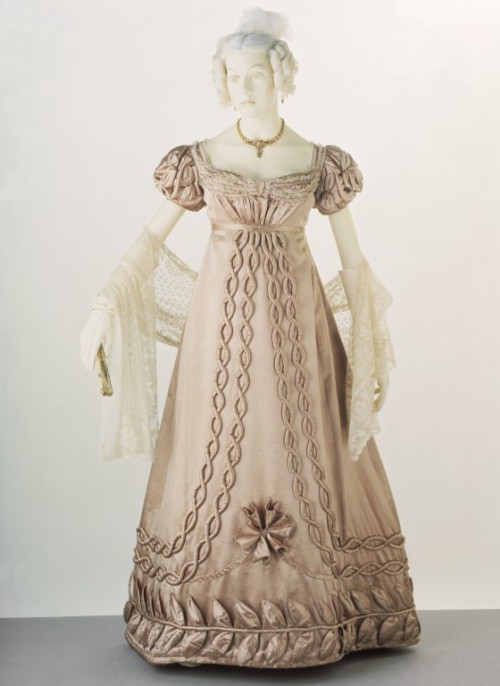
I settled on these as my solid inspirations for quilting patterning and front pattern piece shaping. The first is honestly a little late to be considered Regency but I loved the corded design and it was made for someone with hips which is my issue. All my previous stays/corsets have ALWAYS been uncomfortable in the hip area. I also decided on my rather Spartan materials (just three layers and two of them muslin and quilting in place of cording) because I need something that will breath and not overheat here in the South. I also left out bust gussets and just quilted faux gusset designs on that area since I really don't have anything up top at all.
The quilting took up 2/3 of my time but it actually really helps with shaping and support (and looks pretty too).

I'm actually quite happy with this set of stays and after an extended wear test I can definitely say that hip gussets and not putting boning directly over my hip bones solved all those fitting issues. So yay. I did forget to put shoulder straps on but staring at the pinterest board more, I think I can just tack those on and it'll be just fine. There is also space for a busk in the front but after the story about how your paramore is supposed to carve one for you I decided to not make one and see if someone will one day give me one. :) I'm also debating adding half boning or some nature of boning in the chest side since it does bunch a smidgen under my arms but it's hardly noticeable and they're really comfortable as is.

Historical Sew Fortnightly Challenge 18: RenFest to Regency

I'm a bit late to the game on these but I may have this be my #1 do the full set so this time next year I'll have 26 things! :D But for those who don't know, there's this thing where there's a challenge to make a historical garment of some nature every fortnight. And my historical wardrobe needs expanding so this is perfect for me.

The Challenge:
#18: Re-make, Re-use & Re-fashion "Sew something that pays homage to the historical idea of re-using, re-making and re-fashioning.  Turn one thing into another.  Re-fit or re-fashion an old gown into something you would wear again.  Re-trim a hat for a new outfit, or re-shape a modern hat to be a historical hat.  Re-purpose the fabric from an old garment (your own or a commercial one) into a new garment."
Fabric:
An old Ren Fest dress that belonged to my mother when she was my age. Also about half a yard of muslin (part of the cut of muslin I got that will also be used in the next challenge).

Pattern:
None, winged it.
Year:
1810s/1820s:
Wide detail/band at the hem combined with detailing on the bust
Less of a train back
Notions:
Three sets of hooks and eyes which I had in my stash.
How historically accurate is it?
Ehhh, the skirt portion should be more of a column pleated in the back to give that width of the hem while conforming to my under bust but I didn't want to try adding in a panel to give an illusion to that effect. Also the lace panels are CLEARLY from, like, the 1970s/early 80s. Need to take up the bust line even further too, doesn't seem quite narrow enough. :/
Hours to complete:
12
First worn:
Not yet!
Total cost:
$3
Okay, so let's get into this. I wasn't sure what to do with this challenge when I first read it since I didn't think I had anything to remake (historical at least). Then I snapped recently and reorganized my stash and my costume storage and found this dress. I still remember the first time I got to wear this dress in middle school, I was so excited. My mom had worn it to every RenFest we'd gone to when I was a wee kittybot so I guess I felt grown up when I was a)able to fit into it and b) allowed to wear it.

But I don't wear it to RenFests any more so this has sat, unworn for years now. And it's a shame as I do love it. So I sat staring at it and wondering what to do since I had this challenge in mind and I loved the idea of making it into something I'd have occasion to wear again. But what to do with an off white muslin dress? I didn't want to change it too much especially since I also wanted to fit making a Regency era dress into my schedule. And then it hit me. Raise the bust and modify a few things and it could totally pretend to be kinda Regency. Maybe. Then it was off to the internet to see if there were similar garments out there that I could use as inspiration.
http://www.pinterest.com/pin/3729612164029088/

http://www.pinterest.com/pin/270638258828652167/
http://omgthatdress.tumblr.com/post/11352538512/1820s-dress-via-the-victoria-albert-museum


See, I'm not completely insane. Although admittedly the bottom one is a silk evening dress. They all may be evening dresses and I'm shooting for a day dress. Regency fashion is rather new to me. But now I had a game plan.
1) Sew a panel behind the lace up bust front and sew down the lace.
2)Take up the waist from sitting at my natural waist to the natural lower bust area.
3) Replace the lace sleeves with matching muslin sleeves and removable long sleeves.
4)Extend the lace waist band onto the back.
5) Replace zipper with more period closings
6) Adjust the hem (the dress is a bit too long).

 First was ripping the seams of the sleeves
 Taking the sleeves apart.
 Using the laces sleeves as a pattern. I cut a little smaller that the lace sleeves since I wanted the sleeves a little smaller. I wish I would have made them a bit shorter to be honest.
 Then sew the sleeves together and add a band to each.

Then I cut a strip of that extra muslin for a backing for the lace up front. I lifted the decorative lace and stitched the cluny to the backing.

 The raschel lace then got hand stitched down while I was sitting at my desk at work.
 Next was extending the waist band onto the back! I used the lace from the sleeves to do that.
 All pinned and ready to be stitched.
 I removed the ribbon and raschel from the second lace sleeve...
 ...So I could sew it to the top of the back waistband.
 Then to finish the waist band I folded the bodice up about an inch and a quarter and stitched in the raschel to hide the seam.
 See, just folded up. I wanted to make sure that if I wanted to change this back to a more normal waist I could.
Second to last was making long sleeves from my extra muslin, I basically measured my arm, cut out a slightly nipped tube and fitted one to each arm (my left arm cannot completely straighten and has scar tissue in the elbow so it has different fitting needs than my right arm). I hand stitched the long sleeves onto the dress's sleeves with an easy to remove ladder stitch to make sure this dress could be convertible. :D

Lastly was taking up the hem (and more ironing)!
And then, it was done! Had to wait to do this write up until I finished the next challenge since that was a set of stays!

Wednesday, September 4, 2013

Book Review: Draping Period Costumes


Sobel, S. (2013.) Draping Period Costumes: Classical Greek to Victorian. Focal Press. isbn: 9780240821337

Okay so last week I showed you a good book for draping basic things, this week we're diving into a book on something much more highly specified: historical costuming. Now for anyone who has looked into or done legit historic costuming, as in basing it off extent garments and/or using a historical pattern book which directs you how to make the patterns but doesn't give you 1:1 scale patterns, you know that this is a much more interesting process. Most historical costumes use different shapes (and shapewear) and seam lines that contemporary clothes so it can be a challenge even for an experienced cosplayer. Draping this sort of costume really helps to make sure it will actually fit (take it from someone who took eight tries to get a functioning mid 1800s sleeve). 

This book is best used by someone not completely new to draping but it does give a few pages for how to modify a dress form to fit you (or your friends) and some information on materials. She uses muslin for all of her draping which looks lovely but I'm more of a fan of something with lines myself (like gingham).

And here's what most of the book looks like. She shows the final pattern pieces as well as a fairly step by step process of how she gets there. She doesn't hold your hand nearly as much as Draping Basics does, however, a major part of why I wouldn't suggest this book for absolute beginners. But it is easy to follow along and one of the bonuses is that she shows how to drape and cut both women's and men's historical garments. She also shows how to adjust your dress form to be similar to a man's silhouette.

8/10 All in all a very good overview on historical costuming draping. It chooses major representations of each major time period so it is a good starting place for historical costuming but would be best paired with a historical pattern book if ultimate historical accuracy is your bag. Also not well suited for someone who has never draped before but still usable by someone of that skill level, it'll just take patience and a bit of trial and error.